The world runs on spreadsheets, and so does your business. Zoho Sheet contains the most important parts of Excel and a few more features than you’ll find in Google Sheets. Teams can share documents and work from anywhere, kept in sync by Zoho’s cloud storage and online interface.
Everyone stays on the same page, and your most essential files stay in one place. You’ll find the powerful filtration, visualization, and data analysis tools you’re familiar with, as well as some new features brought to you by Zoho’s algorithmic BI analyst, Zia.
Creating and Importing Spreadsheets
To create a blank spreadsheet, click +New Spreadsheet in the upper right. This creates an empty untitled spreadsheet.
Spreadsheets can also be imported from other services. You can upload XLS and XLSX files from Excel, or import from Google Sheets, Box, Dropbox, and Microsoft OneDrive.
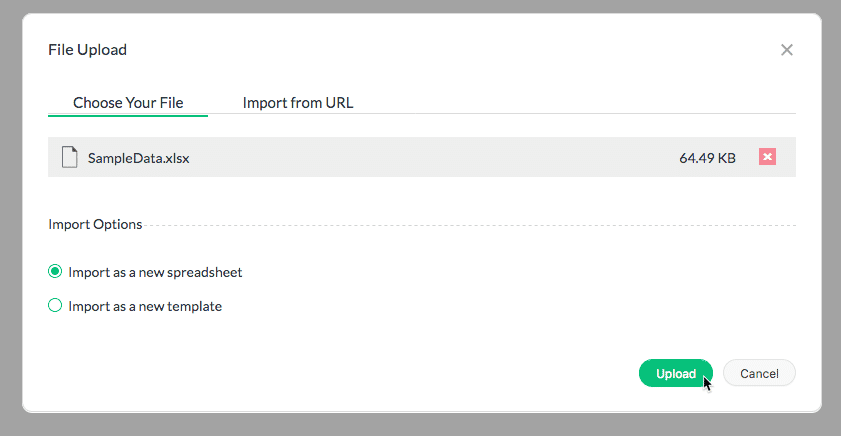
To import a spreadsheet, click the Upload button in the upper right. To upload a file from your local storage, choose Upload Spreadsheet from the dropdown. Importing from a spreadsheet from a cloud service, choose Import from Cloud Drives. If your cloud accounts aren’t connected to Zoho, connect them to import files.
If you’d rather not connect your cloud services, you can download the files from the cloud, then upload them as seen above.
Using Formulas
Formulas are perhaps the most useful tool in any spreadsheet program, and Zoho Sheet is no exception. You’ll find the standard formulas you’re familiar with from Excel or Google Sheets.
To insert a formula, start by clicking the Formula button to the right. That will reveal a dropdown list of all the formulas available in Zoho Sheet, which you can search by name.
If you know the exact syntax of the formula you want to use, you can also type the formula in directly, preceded by an equals sign (=) like in Excel.
Sorting and Filtering Data
Data can be sorted and filtered based on sequential order or common attributes. Lists can be sorted alphabetically or numerically. Spreadsheets can be filtered based on the contents of the cell.
For example, let’s use a spreadsheet that shows what products given customers have purchased. If we want to see everyone that purchased a particular product, we can set a filter for that.
First, select the column or columns you want to filter on. Then, click the Filter button. This will add a small dropdown arrow next to the first selected row in the column. Click that dropdown, and you’ll see a list that contains the contents of every cell. Here, we can use the checkboxes to control what rows we see and what rows are hidden. Any row containing an unchecked entry in the filtered column will be hidden.
As you might imagine, this filtering technique is most useful on discrete data with a distinct number of options as valid.
Pivot Tables
Pivot tables allow you to transform your data set, to reveal existing relationships in the data more easily. In fact, you can discover fundamental pivot tables just by using Zia Insights, Zoho’s AI program for evaluating data. Read below to find out how.
What is a pivot table, anyway?
Don’t let the name confuse you: nothing’s spinning. The “pivoting” is the rearrangement of the data set, which maybe could have had a clearer name. It might be more accurately called a “summary table,” since it’s used to summarize and extract findings from vast, complex spreadsheets. Essentially, you can set attributes of the data as the rows, columns, and data of a new spreadsheet, presenting a different perspective on re-existing data without the need to inefficiently reproduce or destructively rearrange the existing data.
To apply a pivot table to your Zoho Sheet worksheet, use the following steps:
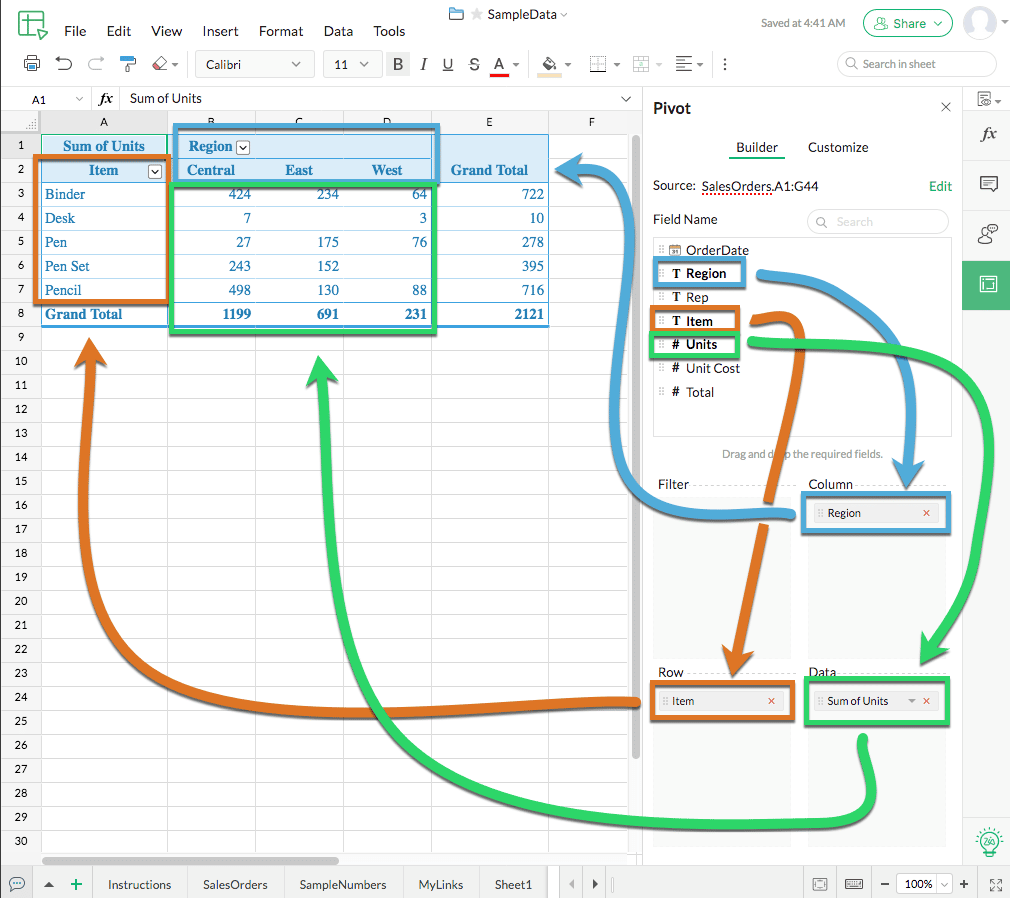
- From the menu bar, select Data > Pivot Table.
- Enter the source you want to use for your pivot table in the Source box.
- Click Ok to create an empty pivot table using your selected parameters.
- Use the drag-and-drop tools to construct a new pivot table. If you’re not sure how this works, feel free to play around: there’s nothing you can do here that will change your existing data. This is just a special, non-destructive view of that data.
- You can also add a Filter criterion, which allows you to only show data that matches specific criteria, just like a column filter.
Visual Basic Macros
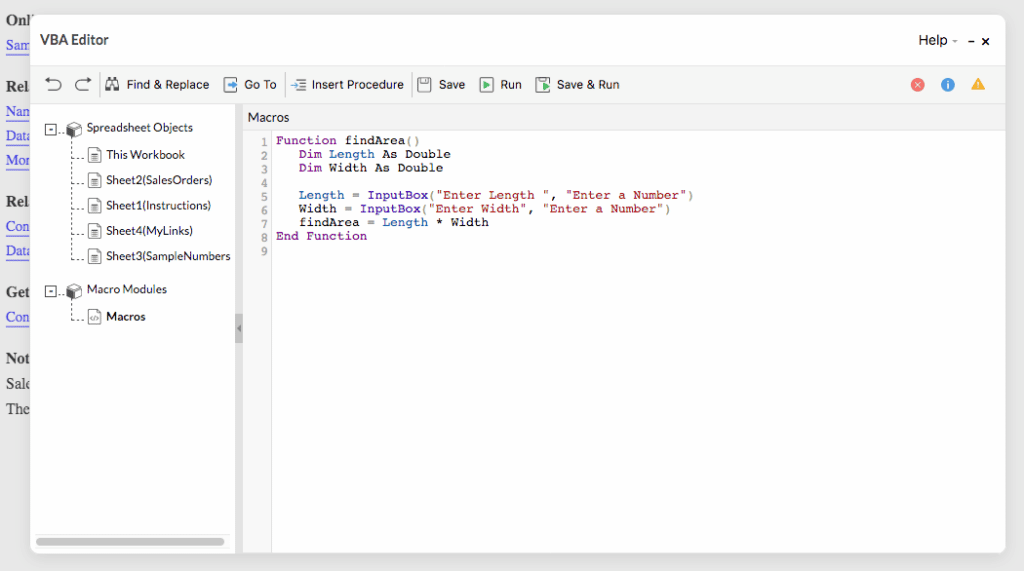
Zoho Sheet includes support for VBA, or also known as Visual Basic Macros. These programmatic automations embedded in documents can be incredibly powerful, but their power also represents a security risk when used nefariously. However, high-level users of Excel will find it difficult to get along without their customary suite of macros. Zoho Sheet offers broad support for VBA, complete with familiar scripting tools for working with Microsoft’s events-driving programming language.
Zoho AI Features
Sheet integrates with Zoho’s Zia AI assistant. With Zia, you can use natural language commands and questions to query your data set or see detailed analysis. You’ll also find smart data cleaning tools (Data > Data Cleaning in the menu bar) that locate and neutralize common errors in your data automatically.
Discovering Pivot Tables and Data Visualizations with Insights by Zia
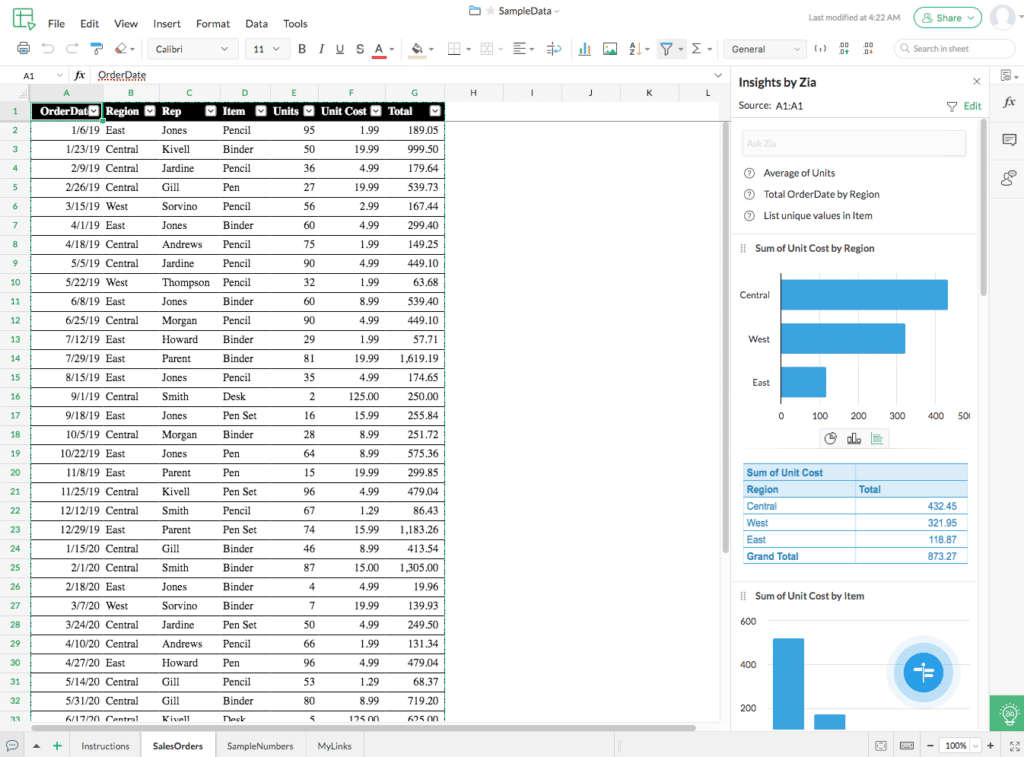
- Select Tools > Insights by Zia from the menu bar
- Click Edit next to the Source input box.
- Enter the region of your open workbook that you want to analyze for pivot tables into the Source box. You can filter this range selection with the Filter icon.
- Use the Ask Zia textbox to make natural language queries against the data set, or click on the suggested options below the input box to get the flavor of Zia’s capability. You might find it’s more capable than you realized.
Publishing and Sharing Spreadsheets
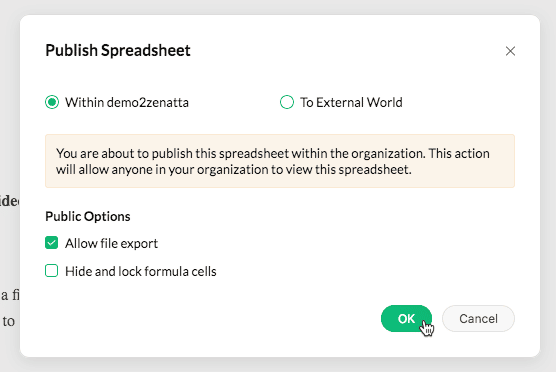
When you’re ready to share your spreadsheet, you have a few options.
- Export your spreadsheet: Select File > Download As… from the menu bar, then choose your desired export file type
- Invite editors and share with collaborators:
- Click the Share icon in the upper right
- Choose Share from the dropdown menu
- Enter the email address of your collaborator
- Adjust collaborator permissions, if desired
- Click Share to commit your changes.
- Publish your spreadsheet online:
- Click the Share icon in the upper right
- Choose Publish from the dropdown menu
- Select your publication parameters from the popup box
- Click Ok to publish your selection
- Copy and save the public link generated by Sheet
Learning Additional Information and Answering Important Questions
Not finding what you are looking for in regards to Zoho Sheet? Drop us a line and we would be happy to see what we can do to fill that gap!
For more guides on Zoho Sheet Click Here.
Are you looking to give Zoho Sheet a try? Here is a free trial to see if it is a fit for your business.


